facebook - pixelimage

What Happens If Immigration Stops You at the Airport

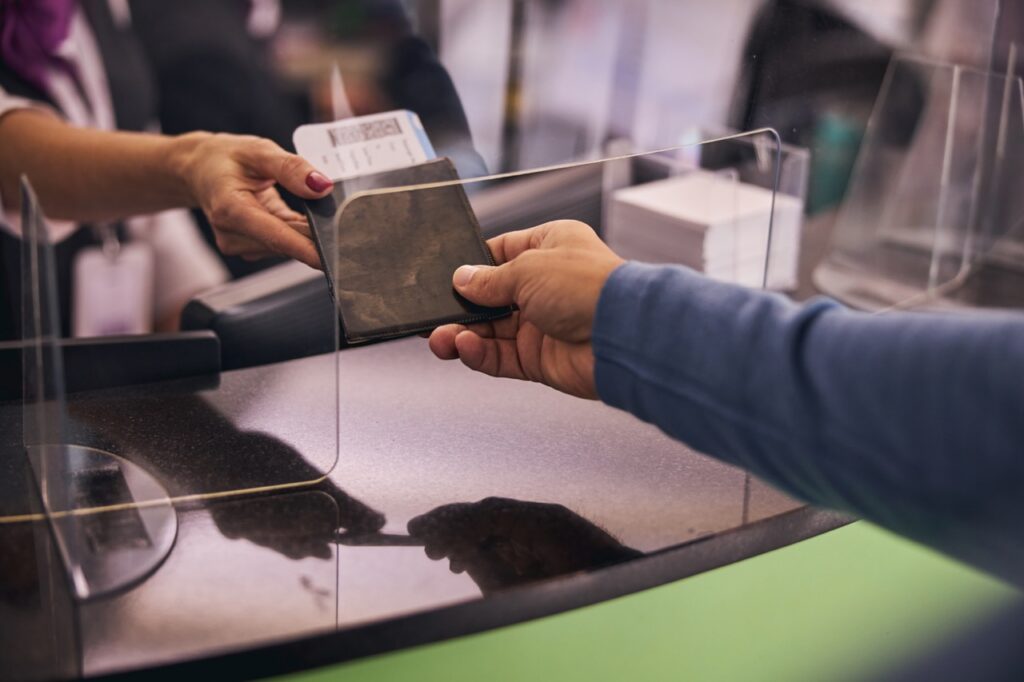
Cropped photo of a Caucasian male tourist handing his travel documents to a female employee

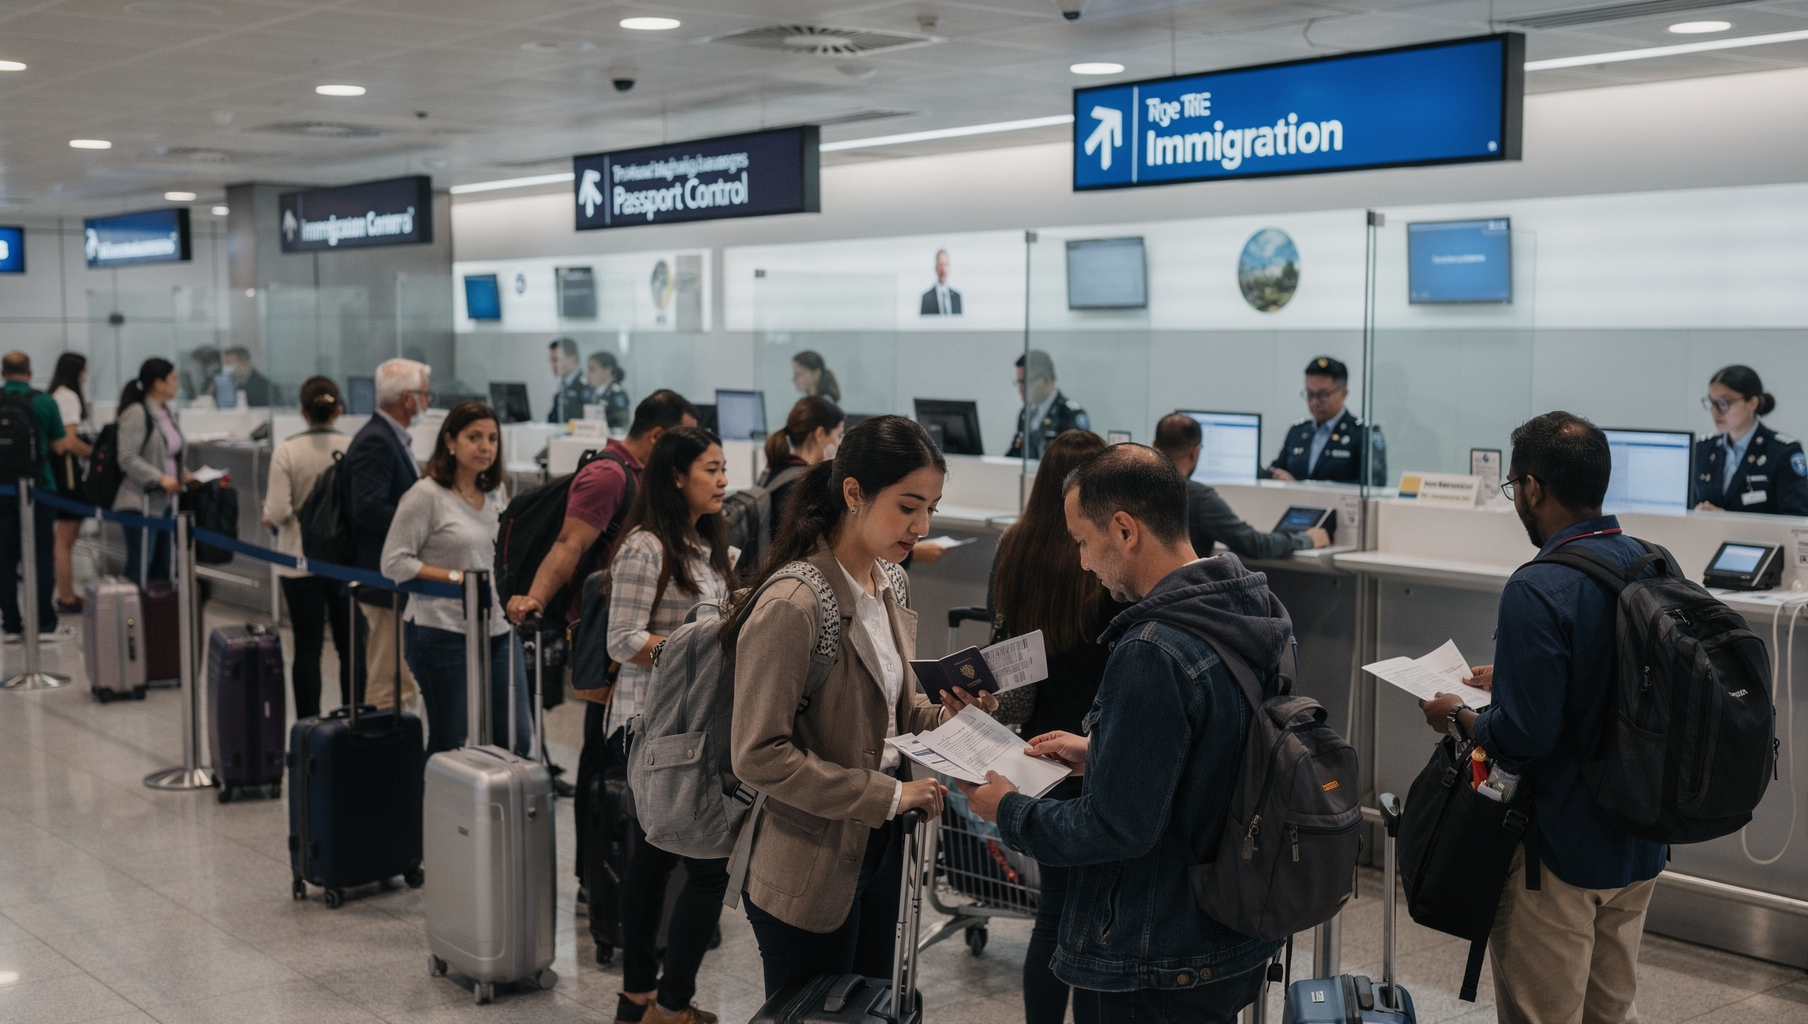
If immigration stops you at the airport, in most cases, a border officer sends you to a secondary interview area to ask more questions, check your documents and confirm you’re allowed to enter. Most travelers are cleared within a short time and go on their way.

Getting pulled aside by an immigration officer feels alarming, even when you haven’t done anything wrong. Your flight has just landed, you’re tired and suddenly you’re being waved out of the regular line and into a side room. It’s a moment that can spike anyone’s anxiety. The good news is that this process is far more routine than it feels and knowing what to expect ahead of time makes it much easier to stay calm and get through it smoothly.

This guide walks through why immigration stops happen, what the process looks like in different countries, what your rights are and exactly what to do if it happens to you.

Immigration vs. Security Screening: Know the Difference

Before we get into it, it’s worth separating two things travelers often mix up:

  • Security screening (in the US, this is TSA) checks your carry-on items and person before you board a flight, looking for prohibited items like weapons or restricted liquids.
  • Immigration and customs control happens after you land in another country (or, for US citizens, when you return home). This is handled by a different agency — U.S. Customs and Border Protection (CBP) in the United States, Border Force in the UK, the Canada Border Services Agency (CBSA) in Canada, and equivalent national agencies elsewhere. Their job is to confirm who you are, why you’re entering, and whether you’re allowed to.

An “immigration stop” refers to this second kind of check. It’s a normal part of every international arrival, not a sign that something has gone wrong.

Why Immigration Might Stop You

Officers refer travelers for extra questioning for all kinds of reasons and most have nothing to do with wrongdoing. As BBC Travel has reported, even routine things like an undeclared watch or a nearly expired passport can trigger a stop. Common triggers include:

  • A random selection. Border agencies build a percentage of completely random checks into their process, so some travelers are chosen with no red flags at all.
  • Document issues. A passport nearing its expiration date, a visa that doesn’t quite match your stated purpose or a torn or water-damaged photo page can all prompt a closer look.
  • Inconsistent answers. If your stated reason for travel doesn’t match your itinerary, luggage or previous answers, officers may ask follow-up questions to clear it up.
  • Watchlist or database matches. Airlines share passenger information with border agencies before you land and officers cross-reference it against law enforcement databases. A name match, even a false one shared with someone else, can trigger a stop.
  • Undeclared cash, goods or valuables. Most countries require you to declare cash or goods over a certain value (often around $10,000 or the local equivalent). Forgetting to declare can mean a delay, even if nothing was concealed on purpose.
  • A pattern of frequent border crossings or unusual travel history that officers want to understand better.
  • Outstanding legal matters, such as certain warrants, unpaid fines or child support arrears that some countries’ databases flag automatically.

What Happens During the Stop

The exact steps vary by country, but the shape of the process is similar almost everywhere.

In the United States (CBP)

  1. Primary inspection. Every arriving traveler shows their passport at a CBP booth or e-gate. The officer asks a few standard questions about your trip.
  2. Referral to secondary inspection. If something needs a closer look, you’re directed to a secondary area which is a separate room near the arrivals hall.
  3. Waiting and questioning. An officer will ask more detailed questions about your travel, your documents and sometimes your luggage. This can take anywhere from a few minutes to a couple of hours.
  4. Resolution. Most travelers are cleared and admitted. In rare cases, someone may be denied entry, have items seized or (very rarely) be detained further.

CBP has said publicly that it aims to treat every traveler with dignity and professionalism during this process and that officers rely on the patience and cooperation of the traveler to move things along.

In the United Kingdom (Border Force)

At UK border control, you’ll show your passport (and visa, if required) and Border Force will usually ask why you’re visiting. If they need more information, you may be taken aside for further questions. If you’re ultimately refused entry, you’ll be told in writing why, whether you can appeal and when you’ll need to leave. In some cases you may be allowed in temporarily while your passport is held and you report to immigration officers at set times.

Elsewhere

Canada’s CBSA, the EU’s Schengen border officers, Australian Border Force and other national agencies follow broadly the same logic: a primary check and a secondary interview if something needs clarifying. The paperwork and terminology differ, but the underlying goal, confirming identity and admissibility, is universal.

What Are Your Rights?

None of this is legal advice. If you’re facing a serious legal situation at a border, the right move is to contact a qualified immigration attorney or your embassy.

This varies by country and by whether you’re a citizen, resident or visitor, so it’s worth knowing the general shape rather than assuming one rule applies everywhere:

  • In the US, you generally do not have a right to an attorney during CBP inspection itself. CBP is not required to allow a lawyer into primary or secondary inspection, though you can typically ask to contact one. Rules on legal representation during border questioning vary elsewhere. The UK, Canada and EU each set their own procedures, so check the relevant government site for your destination if this matters to your trip.
  • Foreign nationals who are arrested or formally detained have a right to consular notification. Most countries are bound by treaty to notify (or offer to notify) your embassy or consulate if you’re detained and your embassy can provide a list of local attorneys, contact your family and check on your welfare, though it generally can’t get you released or intervene in another country’s legal process.
  • Citizens generally cannot be permanently denied entry to their own country, though they can still be delayed for questioning.
  • You’re expected to answer truthfully. Providing false information to a border officer is treated far more seriously than the original issue would have been on its own.

What To Do If You’re Stopped

A calm, cooperative approach is your best tool. Here’s a practical checklist:

  • Stay calm and polite. Officers are trained to notice stress, but being cooperative goes a long way toward a quick resolution.
  • Have your documents ready and organized. Passport, visa or entry authorization, return or onward ticket and proof of accommodation or funds if you have them.
  • Answer questions clearly and honestly. Don’t guess or embellish – “I’m not sure” is a better answer than a made-up one.
  • Ask why, respectfully. You’re generally allowed to ask what the concern is, even if the officer isn’t required to give a detailed answer.
  • If you’re a foreign national and are formally detained, ask that your embassy or consulate be notified. This is a right in most countries, even if it takes time to arrange.
  • Keep a note of names, badge numbers and times if the situation feels unusual, it’s helpful if you need to follow up later.
  • Don’t argue or become confrontational, even if you believe the stop is unfair. Raise concerns afterward through the proper channels (a formal complaint or redress program), not in the moment.

Quick Steps: How to Lower Your Odds of Being Stopped

You can’t control random selection, but you can control the things that most often trigger a closer look:

  • Check your passport’s expiration date well before you travel as many countries require six months’ validity beyond your entry date.
  • Confirm your visa or entry authorization matches your actual purpose of travel.
  • Keep your documents in one easy-to-reach place rather than buried at the bottom of your bag.
  • Declare cash, valuables or goods over the threshold.
  • Keep your story straight: your stated purpose of travel should match your itinerary, luggage and length of stay.

Frequently Asked Questions

What should I do if immigration stops me at the airport?

Stay calm, have your documents ready, answer questions honestly and ask (politely) what the concern is. Most stops end with a short interview and clearance.

How long does a secondary inspection usually take?

It ranges from a few minutes to a couple of hours, depending on the reason for the stop and how quickly your information can be confirmed.

Do I have the right to a lawyer during an immigration stop?

Generally, no. Most countries don’t guarantee access to an attorney during the inspection itself, though you can usually ask to contact one.

What happens if I’m not allowed to enter a country?

You’re typically told in writing why you were refused, whether you can appeal and how you’ll be sent back which is often on the next available flight.

Does a secondary inspection mean I did something wrong?

No. A significant share of secondary referrals is random or based on document technicalities, not suspected wrongdoing.

An immigration stop at the airport is unnerving, but it’s a normal, well-defined part of international travel and not evidence that something has gone wrong. Knowing the difference between security screening and immigration control, keeping your documents in order and staying calm and cooperative if you’re asked extra questions will get you through it faster and with far less stress.

What Time Should You Arrive at the Airport?

What time should you arrive at the airport? For most domestic flights, plan to arrive 2 to 3 hours before departure and for international flights, aim for 3 to 4 hours – earlier if you’re checking a bag, traveling on a busy travel day or flying out of a large or unfamiliar airport.

That’s the short answer. But “2 to 3 hours” or “3 to 4 hours” can mean very different things depending on where you’re flying from, whether you’ve already checked in online and how the parts of travel like parking, check-in, security and the walk to your gate add up on the day. This guide focuses on the full airport-day timeline; for airline-by-airline check-in cutoffs, see our companion guide on how early you can check in for a flight.

Back view of family looking out window together in 2026

Recommended Arrival Times by Trip Type

Travel Sentry | What Time Should You Arrive at the Airport?

Domestic Flights: How Much Time You Need

For a domestic flight, most airlines recommend arriving 2 to 3 hours before departure. That covers:

  • Parking or drop-off and getting into the terminal
  • Checking a bag, if you have one
  • Making it through the security line
  • Walking to your gate, which can take longer than you’d expect at large airports

If you’re traveling with only a small bag as carry-on and you’ve already checked in on your phone, you can lean toward the lower end of that window. If you’re checking a bag, add the extra time as bag-drop counters often close 30–45 minutes before departure, and once that cutoff passes, no amount of hurrying gets you on the plane. If you’re unsure how much you can bring or what it costs to check a bag, our baggage allowance guide breaks that down.

International Flights: How Much Time You Need

International travel takes longer at almost every step, which is why the standard advice is 3 to 4 hours before departure. Here’s where that time actually goes:

  • Check-in and bag drop: international counters often ask for passport verification, visa checks or destination paperwork, which takes longer per traveler.
  • Security screening: international terminals tend to have higher passenger volume and, at some airports, additional screening steps.
  • Passport control: if you’re flying out of a country with outbound passport checks, this adds another queue before you even reach your gate.
  • Larger terminals: international gates are frequently located further from check-in, especially at major hub airports.

If your international trip includes a connection, especially one where you’ll need to clear security again or change terminals, four hours is a safer target than three. Building in extra time here protects the flight deal you booked — a missed connection because of a tight airport arrival time usually costs more, in rebooking fees and lost travel days, than the cheap flights it took to get that price in the first place.

Flying to Europe? Budget Extra Time for the EU Entry/Exit System

 EU Entry/Exit System (EES)

If your international flight is headed to the Schengen area which is most of the EU plus Iceland, Liechtenstein, Norway and Switzerland, build in extra time at the border, not just at your home airport. The EU Entry/Exit System (EES), a new digital border system, started on 12 October 2025 and has changed how non-EU travelers, including UK and US passport holders, are processed on arrival.

On a first visit under EES, you may be asked to register your fingerprints and have your photo taken at a border kiosk, rather than simply getting your passport stamped. There’s no cost and nothing to do in advance, but the checks can take noticeably longer than the old manual stamp, especially during busy travel periods, so it’s worth padding your arrival estimate on the Schengen side of the trip, not just before departure. Once registered, your digital record is valid for three years, and subsequent trips should move faster.

What Affects Your Ideal Arrival Time

The 2-to-3-hour and 3-to-4-hour guidelines are a starting point. A few things can push your ideal arrival time earlier:

You have a checked bag. You should factor in time to drop your checked bag off before going through security.  

You’re flying on a peak travel day. Fridays, Sunday  and the days around major holidays bring longer lines almost everywhere. Add 30 to 60 minutes to your usual buffer on these days.

You’re unfamiliar with the airport. A layout you don’t know, combined with a large terminal, means more time spent finding your gate. Give yourself extra room the first time you fly through an airport, even if the flight itself is domestic.

You’re traveling with a group or with kids. Larger groups move through check-in and security at the pace of the slowest member so build in extra time so the traveling experience stays relaxed rather than rushed.

Check-In, Security and Boarding: The Full Timeline

Check-In Cutoff Times

Most airlines require you to complete check-in a set amount of time before departure: often 30–45 minutes for domestic flights and 60–90 minutes for international ones, though this varies by carrier. Checked-bag drop-off usually closes earlier than check-in itself. These cutoffs are set by the airline, not the airport, so check your specific airline’s policy when you book, especially if you found your ticket through a flight deal with a budget-friendly carrier that may have stricter rules. For a breakdown of cutoff times at major airlines, see our guide on how early you can check in for a flight.

Security Screening

Security wait times vary widely by airport, time of day and travel day. A quiet Tuesday morning might mean a 10-minute line; a holiday Sunday afternoon at a major hub can mean 45 minutes or more. A few habits speed things up:

  • Wear slip-on shoes when possible
  • Keep your laptop and liquids in an easy access spot in your bag, not buried underneath everything else
  • Empty your water bottle before the checkpoint
  • Keep boarding passes and ID together and easy to reach

See our full guide on what you need to remove at security to speed your journey up.

Boarding and Gate Closure

Boarding typically begins 30–45 minutes before departure and airlines call it in groups. Gates commonly close 15–20 minutes before departure and once they close, a confirmed seat doesn’t guarantee a spot on the plane. Arriving at your gate with time to spare means you’re not the traveler running down the terminal, and it gives you a few minutes to check your phone, use the bathroom, or grab a snack before flight.

Pro Tips for a Smoother Travel Day

young asian female traveler with hipster backpack and hat at airport waiting for departure at Vienna Airport. Traveling woman relax , meditate and calm down before plane. flight fears concept

A calm arrival at the airport isn’t just about timing. A few small habits make the whole travel day easier:

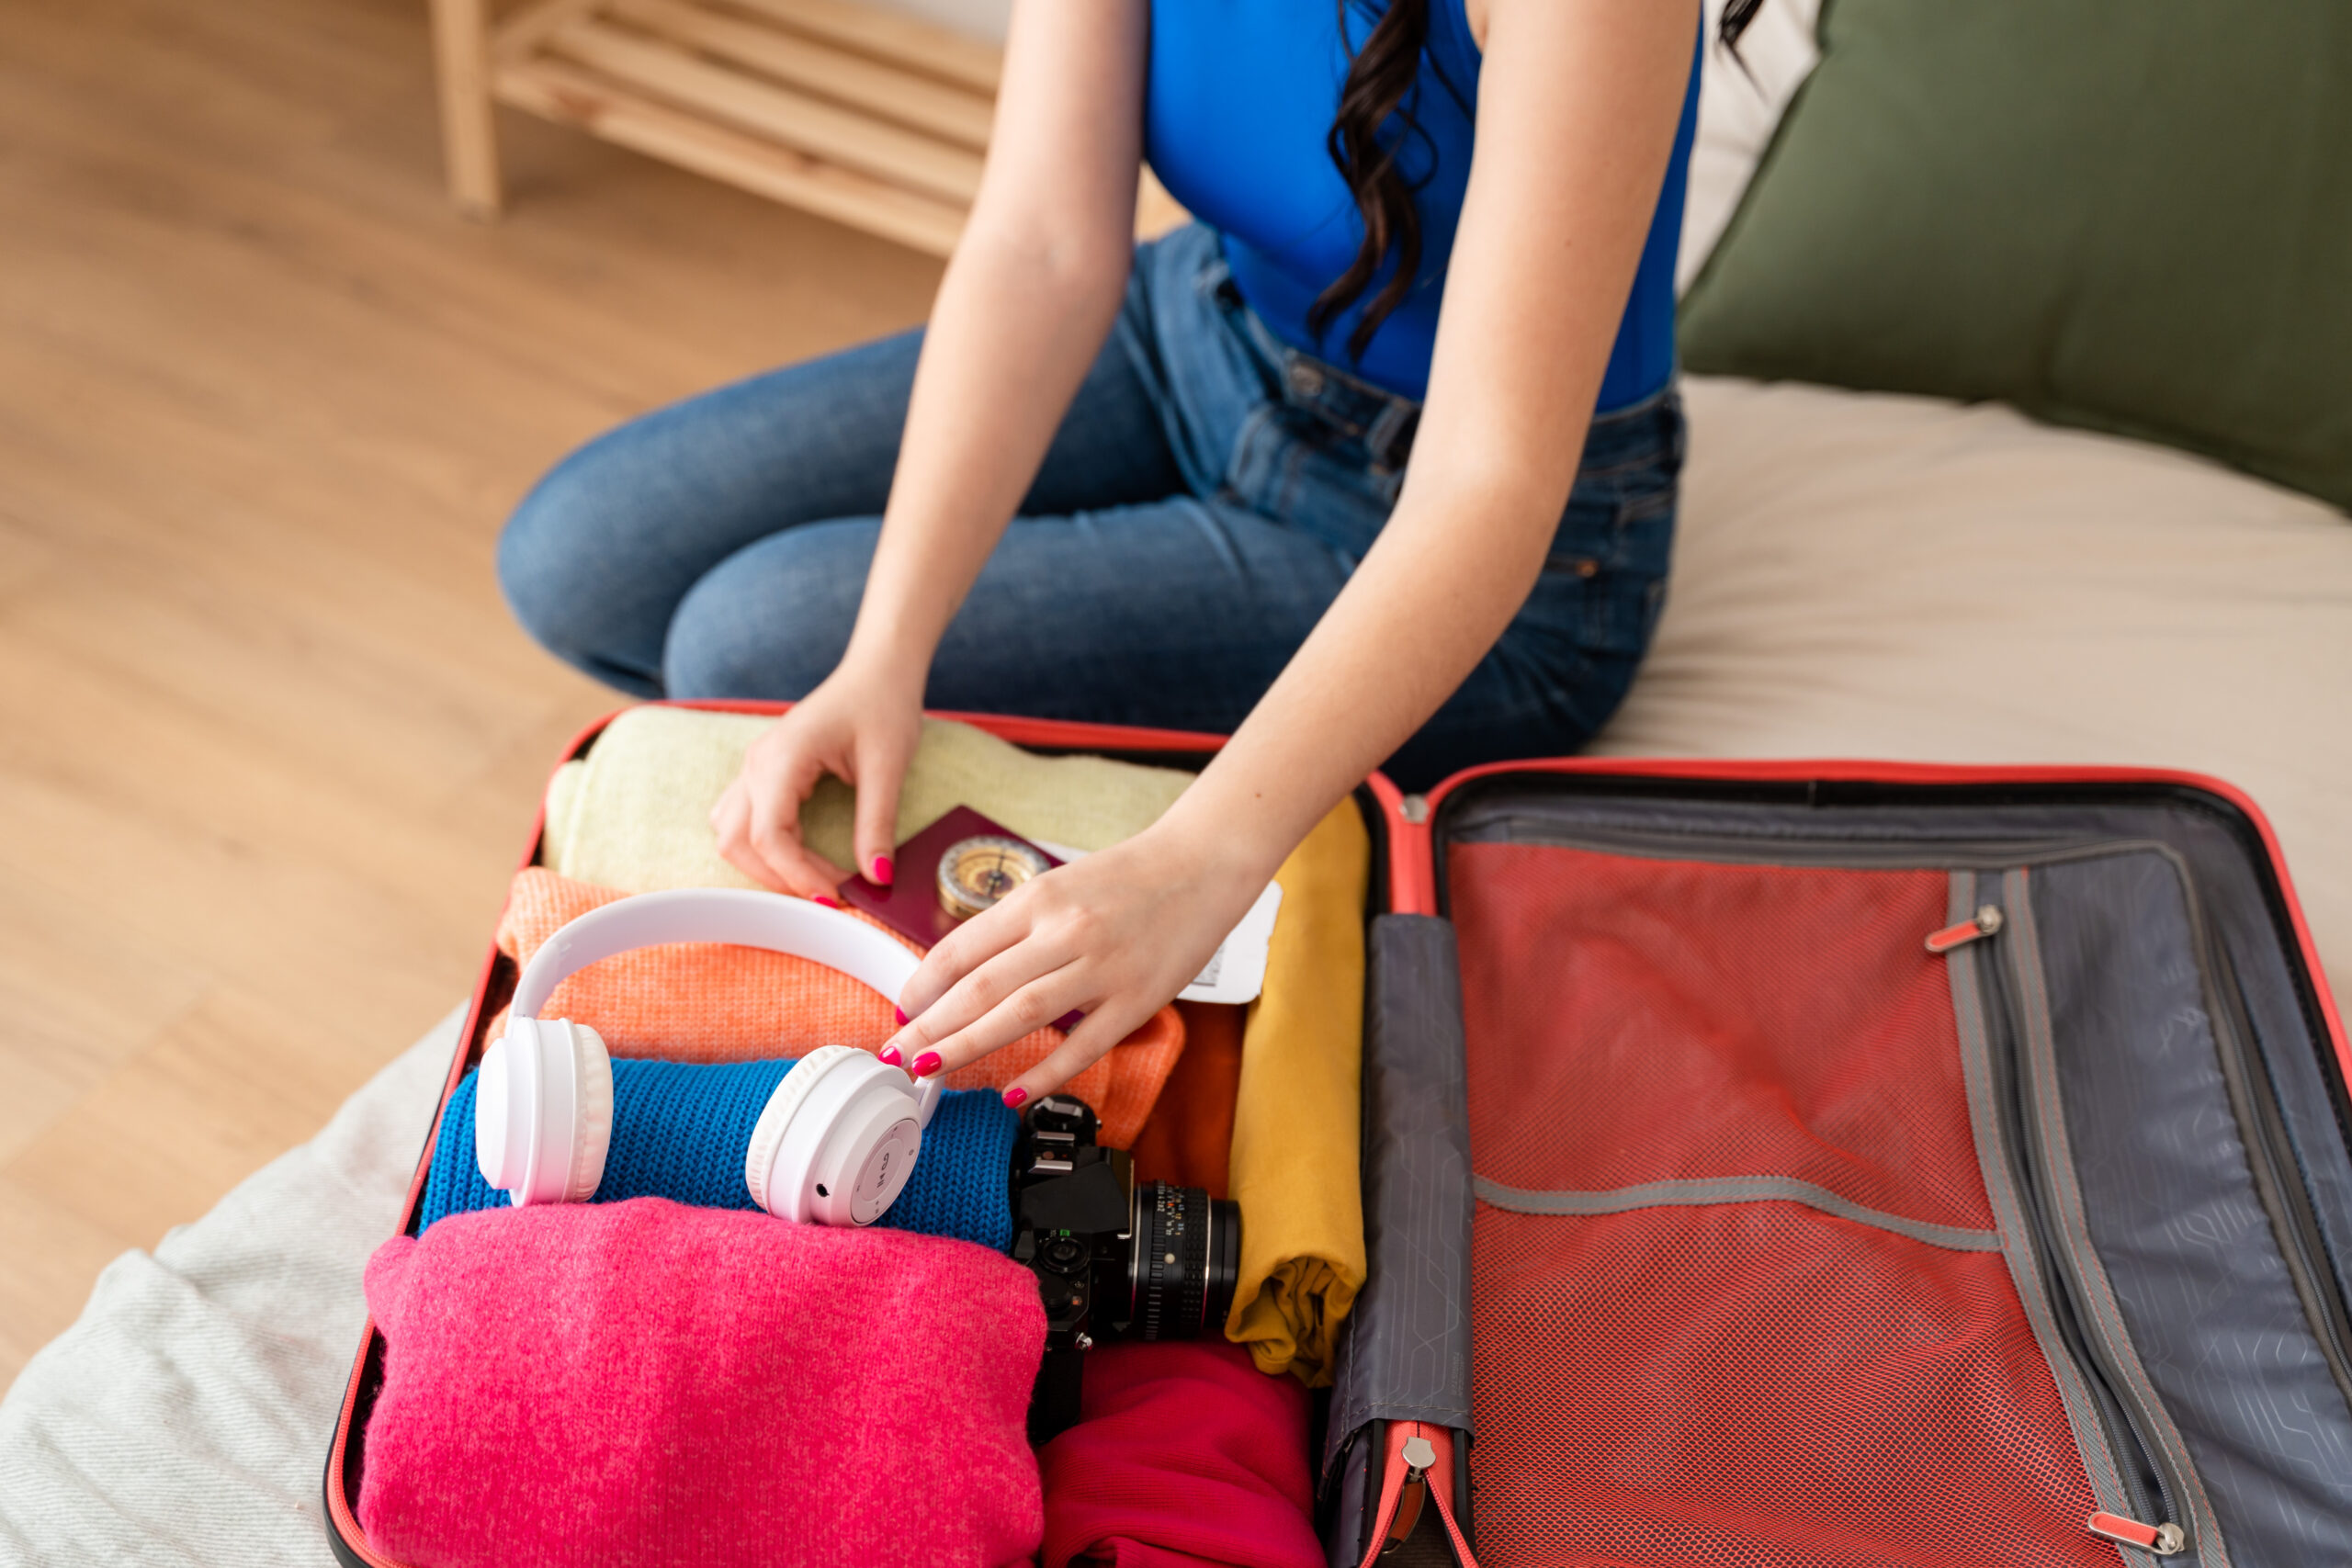
  • Pack with packing cubes. They keep your small bag organized and keep dirty clothes separated from clean ones on multi-stop trips.
  • Keep a credit card easy to reach. A quick coffee or snack before boarding shouldn’t mean digging through your bag at the register.
  • Download a translation app before you leave. The Google Translate app works with limited signal once you’ve downloaded the language pack, which is useful the moment you land.
  • Sort a local SIM card or eSIM in advance. Landing with working data means finding ground transportation or street food recommendations without hunting for Wi-Fi.
  • Check in online the night before. This alone can save 15–20 minutes at the airport.

Some more tips are available here.

Don’t Forget: Airport Day Checklist

☐  Passport, ID, and boarding pass (digital and printed backup)

☐  Checked bag secured with a Travel Sentry TSA lock

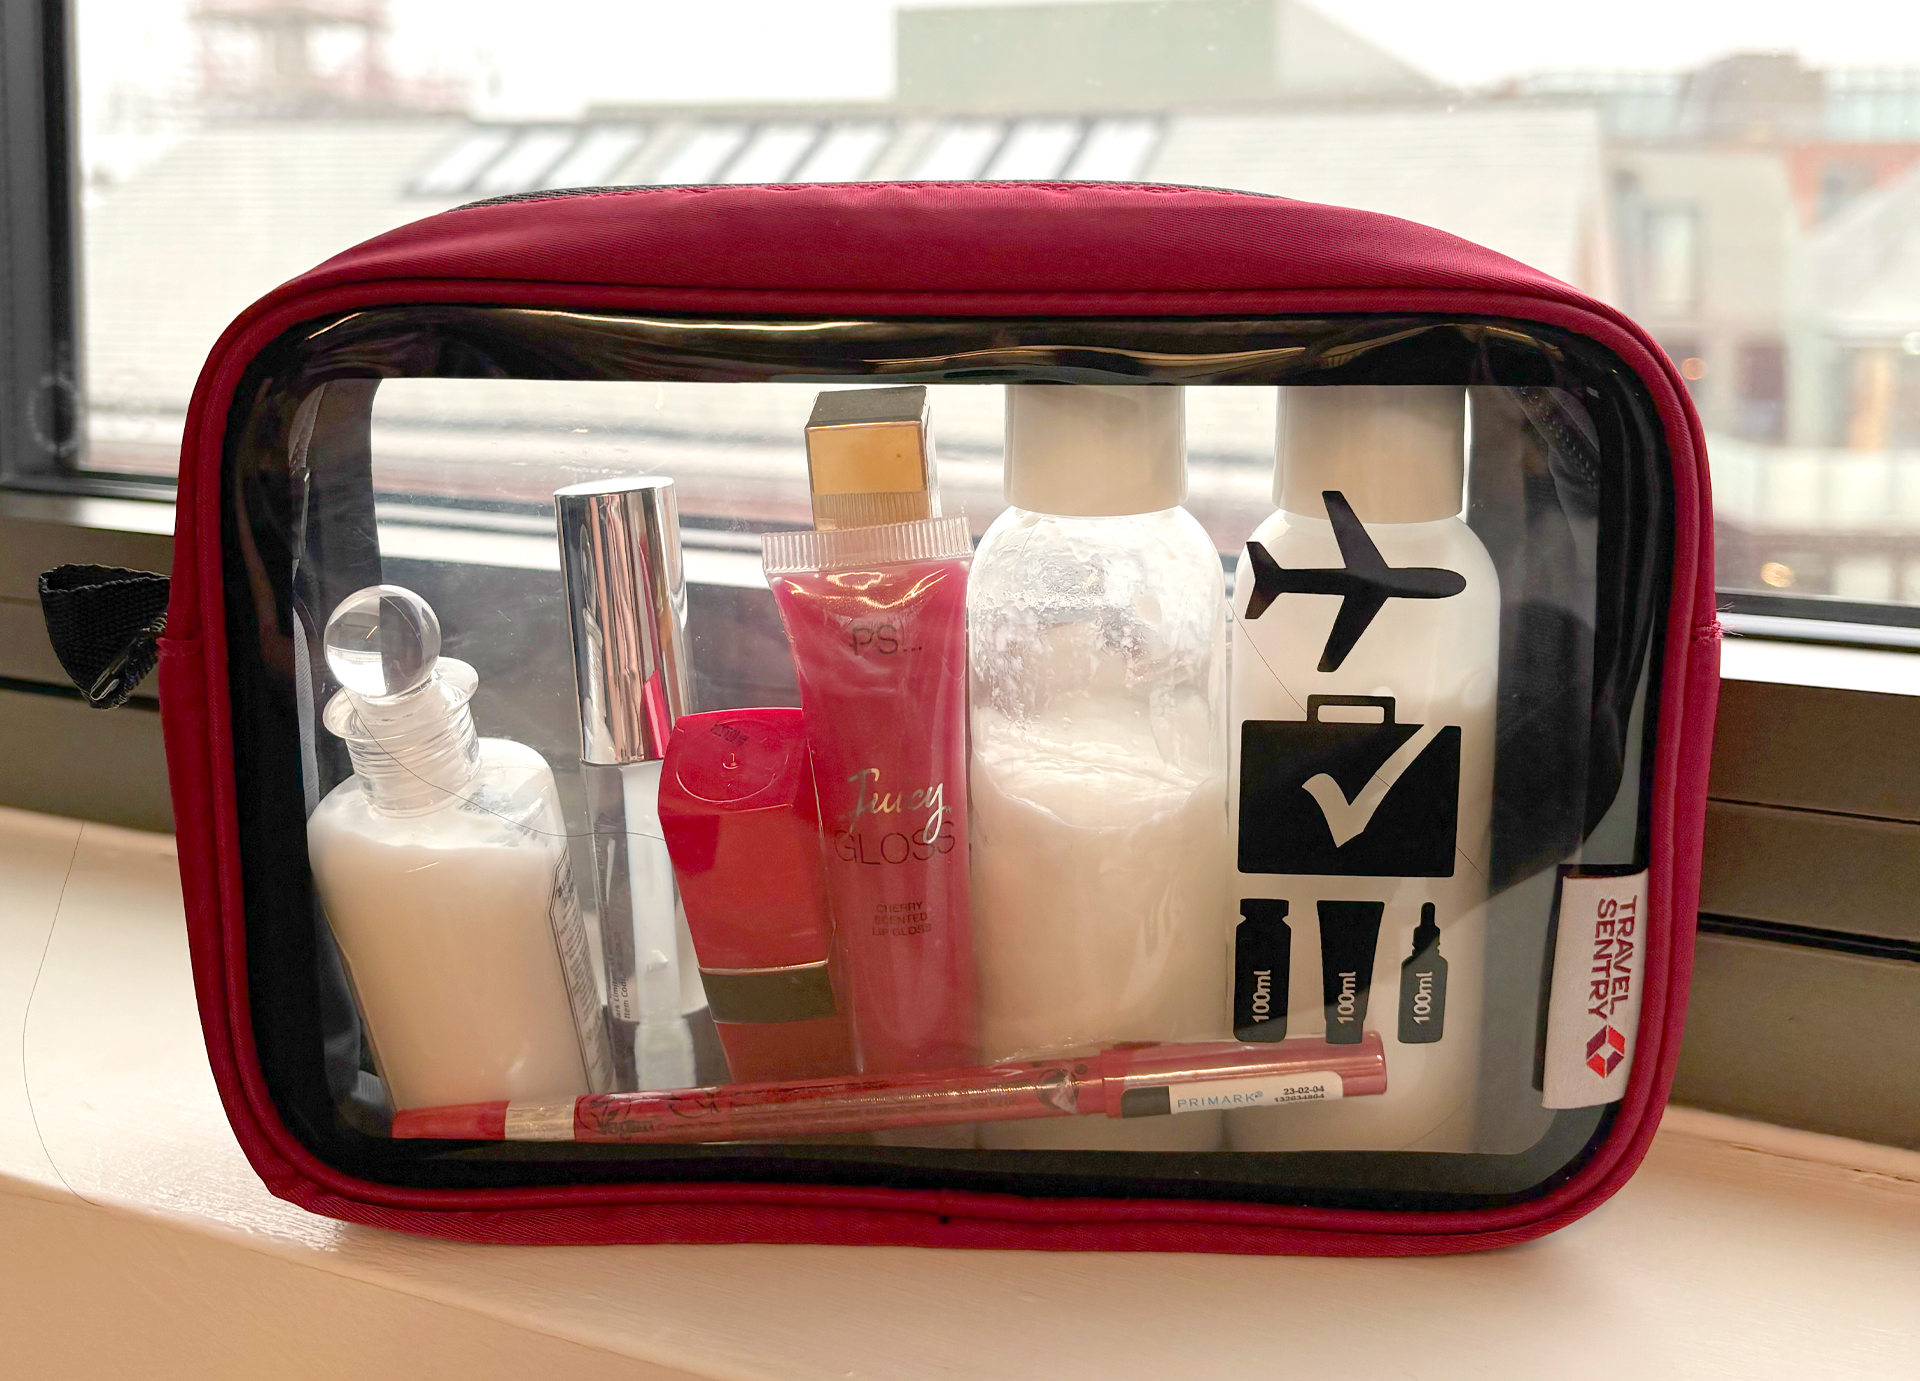
☐  Liquids in a clear bag, within size limits, for easy access at security

☐  Water bottle empty before the checkpoint

☐  Phone charger and a portable battery for a long haul flight

☐  Snacks for the gate or the plane

☐  SIM card or eSIM set up for your destination

☐  Copy of your packing list, in case you need to check anything off after a bag search

There’s no single correct arrival time for every trip but there is a reliable way to find yours. Start with 2 to 3 hours for domestic flights and 3 to 4 for international ones, then adjust up based on whether you’re checking a bag, flying on a busy day or navigating an airport you don’t know well. The extra 30 minutes you spend waiting at the gate costs you far less than the stress of sprinting to make a flight.

Frequently Asked Questions

How early should I arrive at the airport for a domestic flight?

Arrive 2 to 3 hours before a domestic flight. Add extra time if you’re checking a bag or flying during a peak travel period.

How early should I arrive at the airport for an international flight?

Arrive 3 to 4 hours before an international flight to allow for check-in, passport control, and typically longer security lines.

What happens if I arrive at the airport too late?

If you arrive after the airline’s check-in or bag-drop cutoff, you may be denied boarding even with a confirmed ticket. Gates also close 15–20 minutes before departure, and being at the gate after that point usually means missing the flight.

Does arrival time change if I only have a carry-on bag?

Yes. Skipping bag check saves time, so travelers with only a small carry-on can often arrive closer to the lower end of the recommended window, around 2 hours for domestic flights.

Is it safe to lock a checked bag if TSA might need to search it?

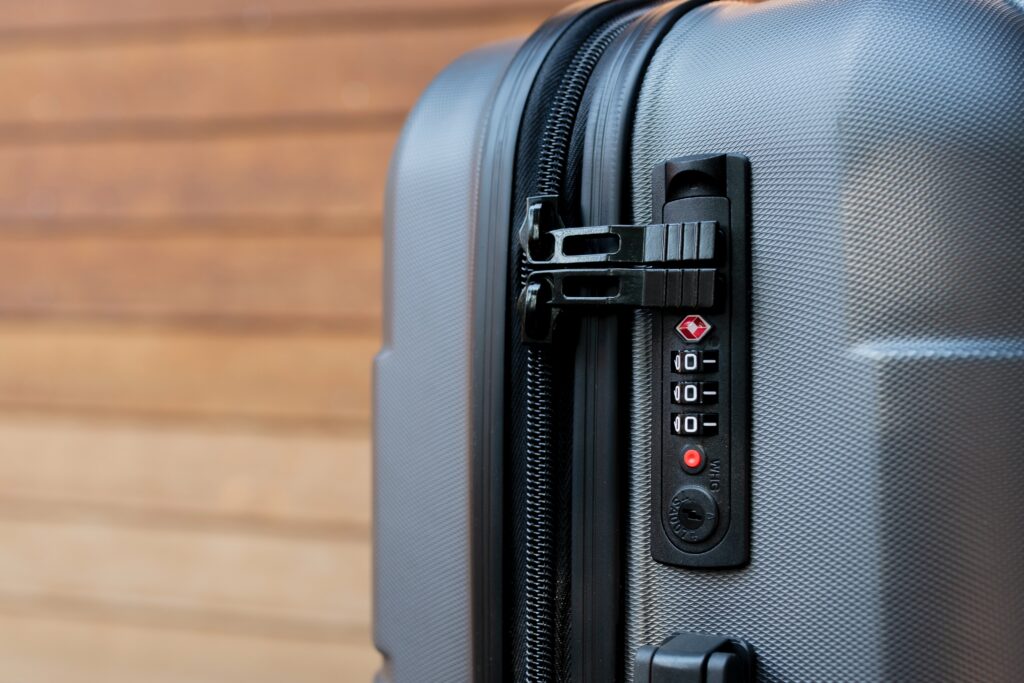
Yes. A Travel Sentry TSA lock allows screeners to open and relock your bag during an inspection using a special tool, without needing to cut the lock. Look for the red diamond logo to confirm the lock is genuine.

Should I arrive earlier during holidays or weekends?

Yes. Add 30 to 60 minutes to your usual arrival time on peak travel days, when check-in and security lines are typically longer.

Does the EU Entry/Exit System affect how early I should arrive?

Yes, if you’re traveling to the Schengen area. The EU’s Entry/Exit System (EES) can require first-time biometric registration, fingerprints and a photo, at the border, which may take longer than a standard passport stamp.

Left Something at Security? Here’s What to Do

If you have left something at airport security, go back to the checkpoint immediately if you’re still in the terminal. If you’ve already left, contact the airport’s lost-and-found office, since recovered items are typically handed over there within 24 to 72 hours. Leaving something behind at security is rarely the disaster it feels like in the moment. There’s a clear process for getting it back and a few habits that make it far less likely to happen again.

Travel Sentry | Left Something at Security? Here's What to Do

Why This Happens So Often

Going through security is one of the most stressful parts of travel and leaving your water bottle, your phone charger, or worse, your credit card is still sitting in a bin back at the checkpoint happens more often than you’d think, at airports everywhere. Security lines move fast, bins pile up and small items slip away in the shuffle. In the US, TSA reports that travelers leave behind roughly 90,000 to 100,000 items at security checkpoints every single month, and major hubs elsewhere in the world see a similar pattern, even where a single published national figure doesn’t exist.

Security checkpoints are designed for speed. You’re emptying pockets, pulling out laptops, tossing your small bag onto the belt and often doing it all half-awake on an early travel day. Add a long line behind you and the pressure to move quickly and it’s easy to walk away without your watch, sunglasses or wallet.

What Should You Do Right Away?

If you realize something is missing while you’re still inside the terminal, if you have time, turn around and go back to the checkpoint immediately. Security staff see this constantly and most checkpoints have a lost-and-found bin right at the podium or nearby office. If your item was picked up by another traveler or an officer, there’s a decent chance it’s already sitting there waiting for you.

If you’re short on time and can’t go back yourself, ask a security officer at your current checkpoint. They can radio ahead to check if your item was recovered, or point you to whichever team, the checkpoint’s own staff or the airport’s lost-and-found, is already holding it.

Who Handles Lost Items, Wherever You’re Flying?

This is where a lot of advice online gets it slightly wrong and where the process looks a little different depending on where you’re flying. In most countries, the agency or company running the security checkpoint isn’t the same one holding onto your lost item for long. Here’s how the three main scenarios break down, wherever you are in the world:

  • Left it at the security checkpoint? Screening is usually run by a national agency or a contracted security provider, TSA in the US, CATSA in Canada or the airport operator itself in the UK, EU and Australia, but in nearly every case, recovered items get handed off to that specific airport’s own lost-and-found. In the US, TSA’s official Lost and Found page will point you to the right airport contact, and items are held for a minimum of 30 days.
  • Left it somewhere else in the airport (a shop, restaurant, bathroom or gate area)? Contact the airport’s own lost-and-found office directly. This is typically a separate department from whichever team runs the security checkpoint.
  • Left it on the plane? Contact the airline, not the security agency or the airport, since the aircraft is the airline’s property once you’ve boarded.
Travel Sentry | Left Something at Security? Here's What to Do

A few examples of how this plays out by region:

  • United States: TSA screens checkpoints nationwide and its official Lost and Found page routes you to the specific airport holding your item, which is held for a minimum of 30 days.
  • United Kingdom: Each airport runs its own lost property service, often through a dedicated team or an outsourced provider. Heathrow, Gatwick and other major UK airports each have their own lost property contact and online search tool, so go straight to that airport’s website.
  • Canada: The Canadian Air Transport Security Authority (CATSA) screens passengers at checkpoints, but items left behind are handed to that airport’s own lost-and-found department rather than held centrally by CATSA.
  • European Union and Australia: Security screening is typically run by the airport operator or a contracted provider rather than one national agency, so recovered items go straight to that airport’s own lost property office.

Wherever you’re flying, when you file a claim, be ready to describe the item, the date you lost it, and the checkpoint or terminal. Security agencies generally recommend putting your name and contact information on the outside of electronics like laptops and phones, so an officer can reach you directly if one turns up.

Have your travel day details ready when you call: the date, approximate time you went through security, checkpoint or terminal number and a clear description of the item.

The pattern to remember: wherever you’re flying, the checkpoint itself is rarely where lost items sit for long. Your departure airport’s own lost property or lost-and-found page is almost always the fastest path back to your belongings, so it’s worth bookmarking before your trip.

How Do You File a Lost Item Report?

Most airports let you file a lost item report online through their website, which is faster than waiting on hold. Include:

  • Full description (brand, color, any identifying marks)
  • Where and roughly when you last had it
  • Your contact information and, if you’re already traveling, a way to reach you at your destination

Using a Travel Sentry ID (TSID) tag also gives you a much higher chance of being reunited with your lost property. Instead of writing your name and number where anyone can see it, the tag carries a unique barcode linked to your contact details in Travel Sentry’s secure registry, so an airline, airport or security officer can scan it and reach you instantly, without your personal information ever being exposed to a stranger handling your bag.

Travel Sentry | Left Something at Security? Here's What to Do

Top tip: take a photo of your open bag before you head to security on travel days. If something goes missing, you’ll have a clear record of what was inside, which speeds up the report and helps if you need to file an insurance or credit card claim later.

What If You Left Something on the Plane?

This is a different situation from a security checkpoint and it’s worth knowing the difference. If you realize you left something on the plane before you’ve left the gate area, go straight back to the gate agent. Give them your seat number and a clear description; if the aircraft hasn’t pushed back yet, they can often send someone on board to check.

If you’re already past security or the plane has departed, you’ll need to file a report with the airline directly, usually through an online form with your flight number and a description of the item. Found items are typically shipped back to you at your own expense.

What Gets Left Behind Most Often

Some items show up in lost-and-found bins far more than others:

  • Water bottles (empty ones you forgot to grab after the checkpoint)
  • Phone chargers and cables, especially ones tucked into an easy access pocket
  • Sunglasses and watches removed for the metal detector
  • Small bags or pouches used to hold liquids or electronics
  • Credit cards and IDs, which sometimes get left behind if you handed them over for a document check
  • Jackets and belts, especially on a long-haul flight when you’re layering up for the cabin

If it’s your ID or credit card, call your bank right away to freeze or cancel the card, even while you’re still working the lost-and-found angle. It’s a small step that can save you a real headache and protect your budget-friendly travel plans from unexpected fraud charges.

It’s also worth noting that not everything left behind at security is an accident. Locked bags and containers sometimes get flagged for a manual check simply because a security officer can’t see inside. Using locks recognized by TSA and equivalent security agencies internationally means officers can open and re-lock your bag without cutting it off, which keeps your belongings secure without adding extra delay or confusion at the checkpoint, wherever you’re flying.

How to Make This Less Likely Next Time

A few small changes to how you pack and move through security can make a big difference.

Use packing cubes and dedicated pouches. If your liquids, electronics and small items each live in their own labeled pouch inside your packing cubes, you’re less likely to leave loose items scattered across the X-ray belt.

Keep a “security kit” in your small bag. Put your phone charger, sim card, portable battery and any small electronics in the same spot every single time. That habit alone prevents most of the “did I grab everything?” panic.

Do a two-second bin check. Before you walk away from the belt, glance back at every tray. It sounds obvious, but it’s the single most effective habit for avoiding this problem entirely.

Separate your dirty clothes from your travel documents. It sounds unrelated, but when your carry-on is disorganized, with dirty clothes mixed in with your electronics and documents, it’s much easier to lose track of small items during a security recheck or bag search.

Don’t Forget: A Quick Checklist for Security Days

Before you approach the checkpoint, run through this short list:

  • Water bottle emptied and easy to grab afterward
  • Phone, charger, and sim card in your designated pouch
  • Credit card and ID back in your wallet, not loose in a tray
  • Laptop and tablet back in your bag before you walk away
  • Jacket, belt and any accessories collected from the bin
  • Quick glance back at the belt before heading to your gate

Keeping this list in your Notes app means you’ll have it ready no matter which airport or country you’re flying through.

Frequently Asked Questions

Does the security agency keep lost items, or does the airport?

In most countries, no. The agency or company that runs the checkpoint, TSA in the US, CATSA in Canada, or the airport’s own security team elsewhere, hands recovered items over to the airport’s lost-and-found. TSA is a partial exception: it maintains an official Lost and Found tool that routes you to the right airport contact, but the item itself still sits with that airport.

How long are lost items held before they’re disposed of?

This varies by airport and country. In the US, TSA holds checkpoint items for a minimum of 30 days. Elsewhere, each airport sets its own timeline, so it’s worth asking directly when you file your report.

Can I go through a different checkpoint to look for my item?

No. If you’re still in the terminal, return to the exact checkpoint where you went through security. Items are logged and held at that specific checkpoint, not a central location you’d reach through another line.

What should I do if I lost my ID or credit card at security?

Report it to your airport’s lost-and-found immediately, whether that’s through TSA’s Lost and Found tool in the US or the airport’s own office elsewhere, and call your bank or ID-issuing agency at the same time to freeze or replace it. Don’t wait for the search to resolve before protecting your accounts.

Airports recover thousands of items every year and most travelers get their things back within a few days if they act quickly. The bigger cost usually isn’t the item itself, it’s the time and stress spent chasing it down mid-trip.

That’s why the best approach is prevention: pack with intention, keep your essentials in consistent spots and take those extra few seconds at the checkpoint before you move on. Whether you’re exploring a new destination or heading out on a routine business trip, a little structure at security means one less thing to worry about and more energy to spend enjoying your trip.

What Do You Have to Remove at Airport Security?

Personal Items, liquids, and laptop in container at airport security check before flight.

At most checkpoints, you’ll need to remove your shoes, belt and jacket, as well as pull your laptop and liquids out of your bag, though TSA PreCheck and similar programs let you skip several of these steps.

The stress at security often comes from not knowing which of these apply to you or forgetting something small in a pocket while the line backs up behind you. Below is a full, checkpoint-ready breakdown: what to remove, what to pull out of your bag, what changes with PreCheck or international travel and a few pro tips that make the whole process faster.

The Basics: What Almost Always Comes Off

At a standard security checkpoint plan to remove:

  • Shoes. Nearly all footwear goes through the X-ray, no exceptions for sneakers or boots. Slip-on shoes save real time here.
  • Belts. Metal buckles set off the walk-through metal detector almost every time.
  • Jackets, coats and heavy outerwear. This includes hoodies with zippers, blazers and scarves with metal clasps.
  • Hats, especially anything with metal grommets or wire brims.
  • Bulky jewelry, like large metal necklaces, belts or anything with a lot of metal hardware.

Smaller jewelry, wedding bands and stud earrings usually don’t need to come off, but if you’re wearing something large and metallic, it’s faster to just take it off before you reach the scanner rather than get pulled aside.

What Comes Out of Your Bag

This is the part that trips people up most, especially on their first long-haul flight. Officers need a clear, isolated view of these items, so they can’t stay buried in your carry-on:

Electronics

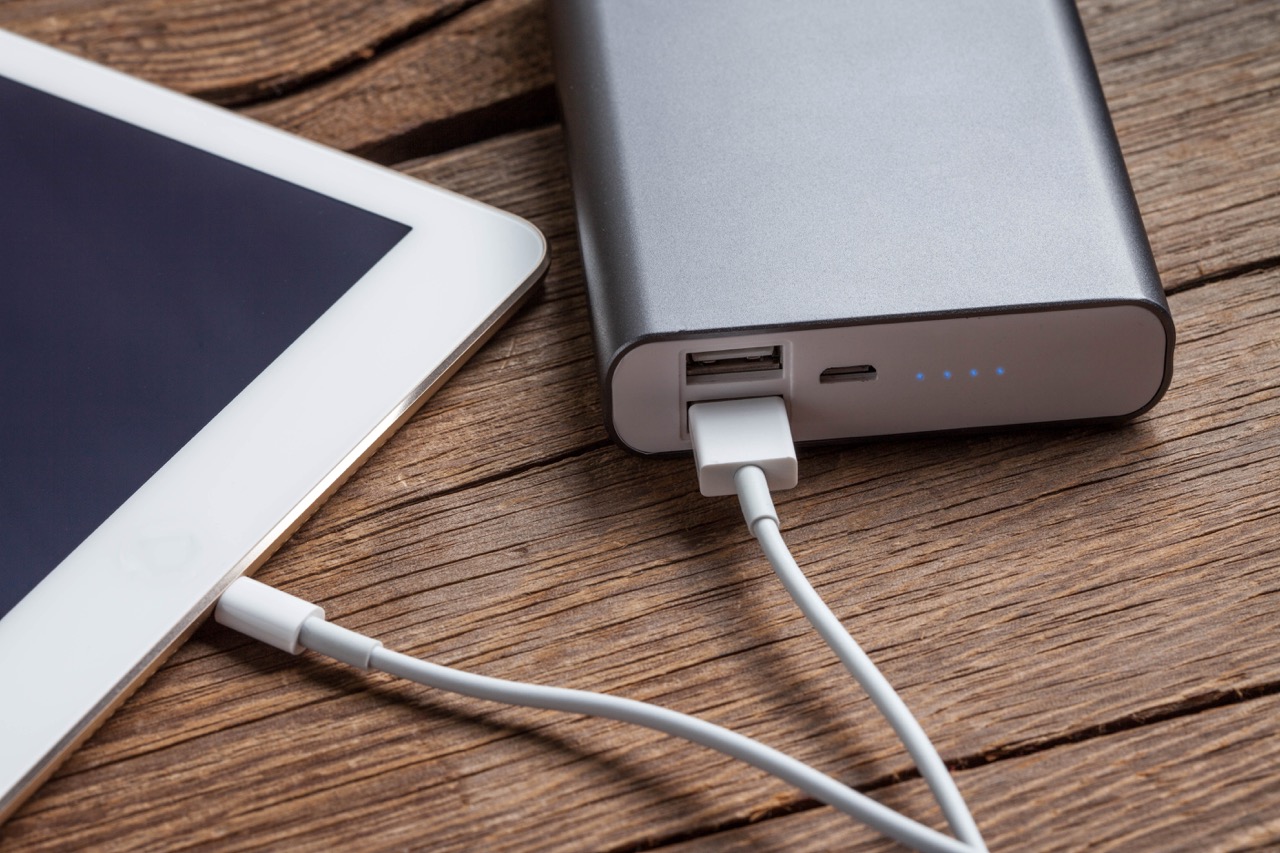
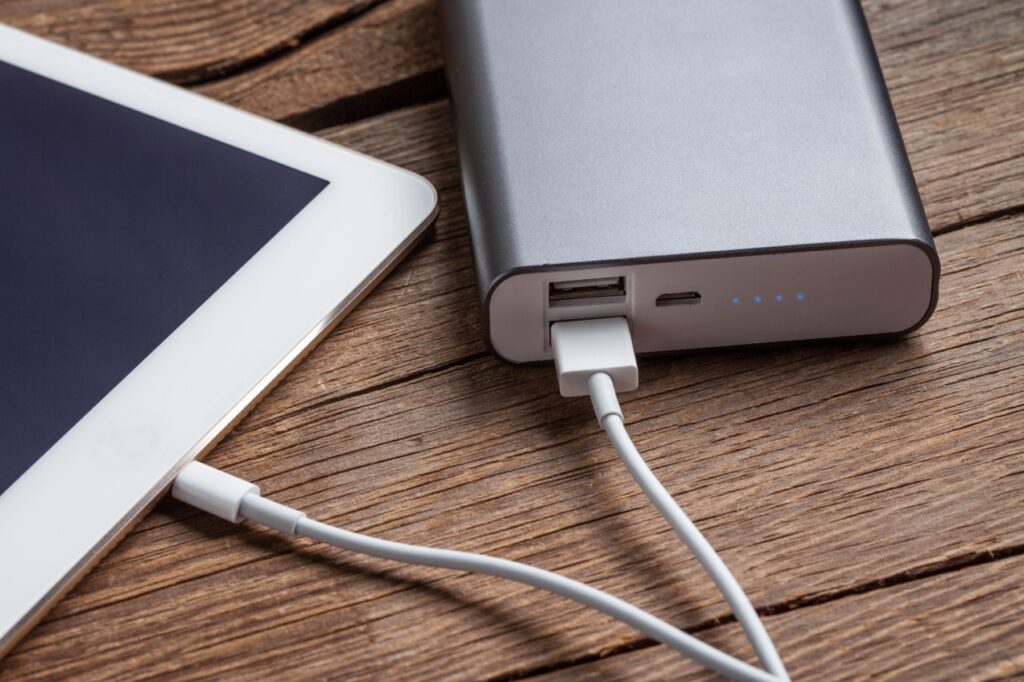
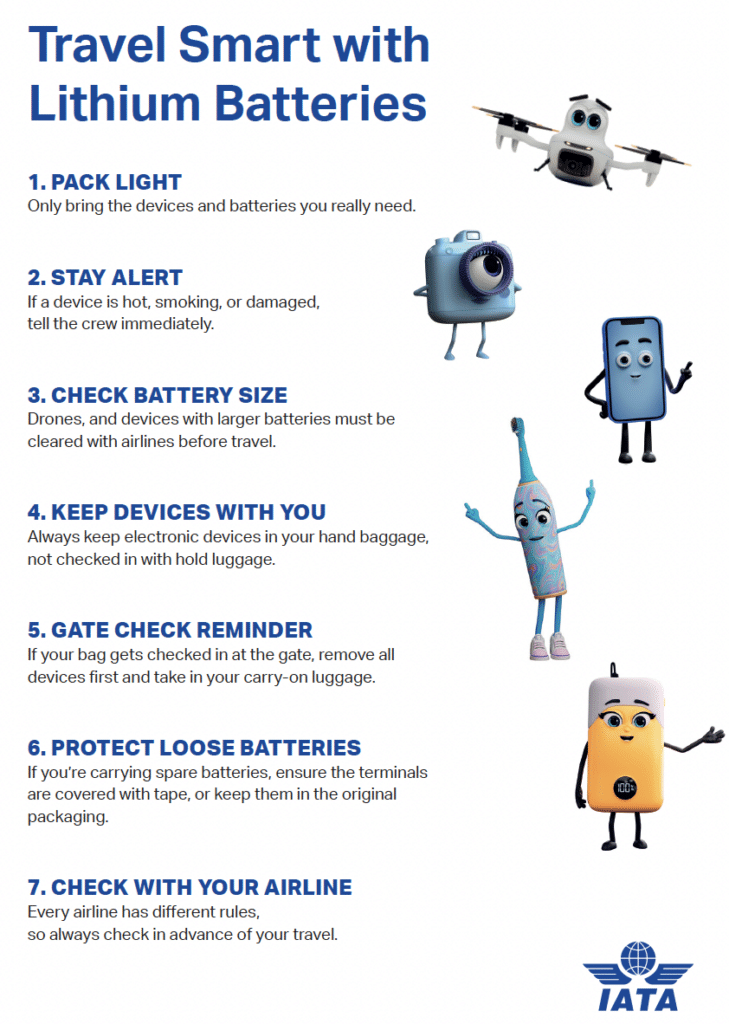
Laptops need to come out and go into their own bin, screen down, with no other items on top. Power banks should also be removed at security as well. See our guide on power banks here. In most U.S. airports, tablets can typically stay in your bag, but rules vary by airport and checkpoint, so watch the signage or ask the officer.

Liquids

This is where the classic 3-1-1 rule applies: liquids, gels, and aerosols in containers of 3.4 oz (100ml) or less, all fitting in a single 1-quart clear bag. Your water bottle is the exception here, it just needs to be empty before you reach the scanner. Bring an empty one and refill it after security; it’s one of the simplest ways to save money and cut down on plastic waste during your traveling experience.

Pack your quart bag of toiletries somewhere with easy access, like the very top of your small bag or an outer pocket, so you’re not digging through dirty clothes and packing cubes while the line backs up behind you.

Pockets: The Small Stuff People Forget

Officers will ask you to empty your pockets and this is where checkpoints slow down the most. Before you step in, clear out everything:

  • Phone
  • Wallet, especially anything with a credit card or loose coins
  • Keys
  • Any small electronics, like a portable charger or a sim card ejector tool
  • Gum, mints or anything metallic-wrapped
  • Hair clips or hair ties

A lot of experienced travelers keep an empty jacket pocket or a small pouch just for this walk-through moment, so everything goes in one place instead of getting distributed across three different pockets and a coat.

See our article about How Scanners Work for more information.

Special Cases: PreCheck, Global Entry and CLEAR

If you’ve enrolled in TSA PreCheck, you generally get to skip several of these steps:

  • Shoes stay on
  • Laptops can stay in your bag
  • Liquids can stay in your bag (still within the 3-1-1 limits)
  • Belts often stay on, though this varies by officer and airport

Global Entry includes PreCheck benefits and also speeds up the customs process when you land internationally. CLEAR doesn’t replace the physical screening but verifies your identity faster, so you skip the ID-check line and move straight to the bins.

If you fly more than a couple of times a year, the application fee for PreCheck often pays for itself in saved time and reduced stress alone.

International Airports: What Changes

Airport security isn’t the same everywhere and it’s worth knowing before an international travel day:

  • European Union airports generally follow similar liquid restrictions to the U.S., though some newer scanners are starting to allow larger liquid containers and laptops to stay in bags.
  • Some Asian airports (Japan, South Korea, Singapore) have very efficient, well-signed checkpoints, but still expect shoes and laptops out.
  • A few countries require a secondary hand-inspection of electronics or ask you to power on your laptop or phone to prove it works, which has been a security measure in parts of the U.S. and Europe as well during heightened alert periods.

When in doubt, arrive a bit earlier and follow the signage. Airport staff would much rather guide you than rush you.

The UK’s New Scanners: An Exception Worth Knowing About

A few UK airports have been rolling out next-generation 3D CT scanners that can allow liquid containers larger than the old 100ml limit – in some cases up to 2 liters per container, according to official UK government guidance. Some airports with these scanners also let passengers keep laptops in their bags.

Government guidance is explicit that the rules “depend on the airport.” There’s no single nationwide standard yet. Because the picture differs airport to airport (and can differ again on your return journey through a different one), don’t assume the new rules apply just because you read about them somewhere. Our advice would be to pack as if the standard 100ml rule applies unless you’ve confirmed otherwise. It’s a case where being pleasantly surprised at the checkpoint beats being caught out.

What If Your Checked Bag Gets Pulled for Inspection?

Security screening isn’t limited to the checkpoint you walk through as checked bags get physically inspected too and you won’t be there when it happens. If your bag is locked with a Travel Sentry approved lock, the security agent can open it with a special secure tool and re-lock it before it heads to your flight, no damage done. A lock without that mark may simply get cut off if your bag is selected. Using a Trave Sentry lock the difference between finding your bag secure at baggage claim and finding your lock in pieces at the bottom of your suitcase.

Packing Smart So Security Goes Faster

A little packing strategy goes a long way toward a stress-free checkpoint experience:

  • Use packing cubes to separate liquids, electronics and clothing, so you’re not unpacking your entire checked bag on a public counter.
  • Keep your laptop and toiletry bag near the top of your carry-on or in a designated pocket for quick, easy access.
  • Put your phone, wallet and credit card in the same pocket every time you fly, so pocket-emptying becomes automatic.
  • Wear slip-on shoes and a beltless outfit on travel days when you can. It’s a small choice that adds up over a lifetime of flights.
  • Screenshot your boarding pass in case your phone battery dies or your Google Translate app and other apps are eating up storage on an older phone abroad.
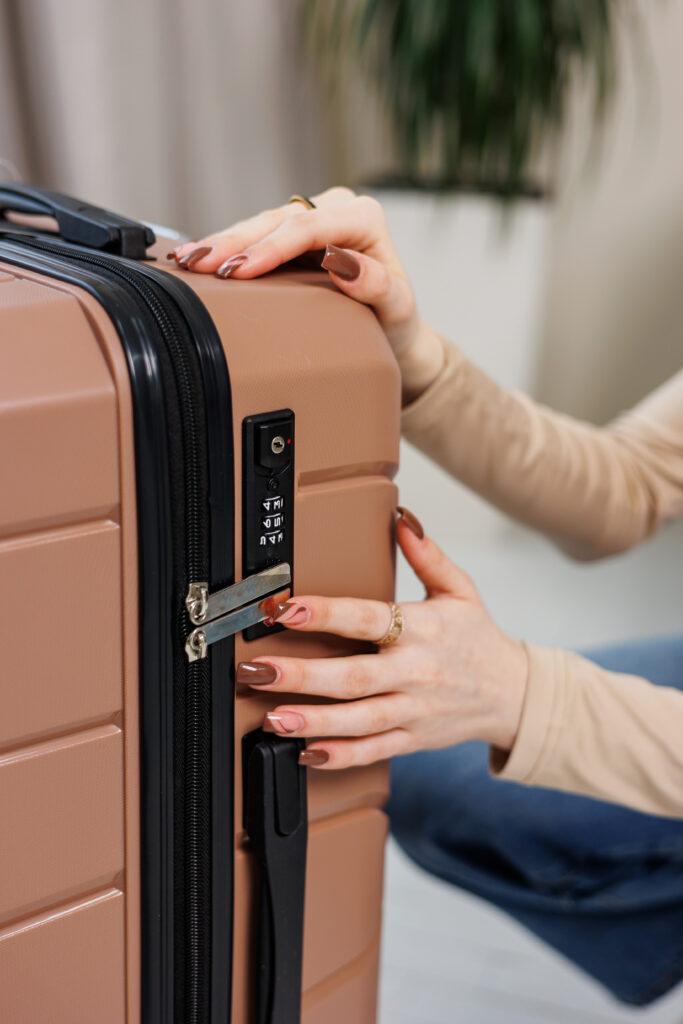
  • Lock both carry-on and check-in luggage for peace of mind. Your carry-on can be pulled in with the hold luggage at the gate so locking it ensures it will be secure when you’re reunited with it at the carousel.

Quick Checklist: Before You Reach the Scanner

Use this as your mental (or literal) packing list for the walk up to the X-ray belt:

  • Shoes off
  • Belt off
  • Jacket, coat or hoodie off
  • Laptop out of its bag, alone in a bin
  • Quart bag of liquids out and visible
  • Water bottle emptied
  • Pockets cleared: phone, wallet, keys, coins
  • Hats and bulky jewelry removed

Don’t forget: If you’re checking a bag, double check it doesn’t contain anything prohibited that you meant to keep in your carry-on, like medication, chargers, or your travel documents. Once that checked bag disappears down the belt, it’s gone until baggage claim.

Airport security doesn’t have to be the stressful bottleneck it’s often made out to be. Once you know exactly what comes off, what comes out of your bag and how to organize your carry-on for easy access, the whole process becomes routine rather than rushed.

Frequently Asked Questions

Do I have to take my shoes off at every airport?
At most standard checkpoints, yes. TSA PreCheck, CLEAR, and some newer scanning lanes let you keep them on, but plan on removing them unless you know your checkpoint qualifies.

Can I keep my laptop in my bag with TSA PreCheck?
Usually, yes. PreCheck typically lets you leave your laptop and 3-1-1 liquids in your carry-on, though this can vary slightly by airport and officer.

What happens if TSA needs to inspect my checked bag and it’s locked?
If it’s secured with a Travel Sentry TSA lock, the screener can open it with a secure tool and re-lock it without any damage. A lock without a recognized mark may be cut off instead.

What liquids can I bring through airport security in my carry-on?
Containers of 3.4 oz (100ml) or less, with all of them fitting inside a single 1-quart clear bag. Anything larger needs to go in a checked bag.

Do international airports have the same security rules as the U.S.?
The basics are similar almost everywhere, but details vary. Some EU and Asian airports allow larger liquids or laptops to stay in bags with newer scanners; others may ask you to power on electronics for a manual check.

What Happens to Unclaimed Luggage?

Most checked bags that go missing come back quickly:  roughly 92% of mishandled bags are reunited with their owners, usually within a day or two. The small share that are never claimed spend about three months in airport storage, after which they are considered orphaned and are sold, donated, or recycled — often through specialist resellers and auction houses. This guide walks through the full journey a bag takes when it doesn’t show up on the carousel.

Travel Sentry | What Happens to Unclaimed Luggage?

How many bags get lost, and how many come back?

About 92% of mishandled bags are returned to their owners, usually within a day or two. This isn’t luck — airlines use increasingly sophisticated tracking technology. In 2025, airlines mishandled around 24 million bags worldwide, but the trend is improving: mishandling rates fell 23% in 2025, according to research from SITA, the lowest level outside the Covid years. Every lost bag costs airlines money and customer trust, so the industry keeps investing in fixing it. “Better” is still a way off “perfect,” though – when a bag isn’t found quickly, it enters a system that can feel like a black hole.

What’s the difference between delayed and lost baggage?

A bag is “delayed” if it reaches you within 21 days of your arrival, and officially “lost” once the airline admits it can’t find it or 21 days pass without its return. The distinction matters because it determines when you can file a claim for the value of what you lost.

Travel Sentry | What Happens to Unclaimed Luggage?

How do airlines try to find a missing bag?

The moment a bag misses your flight it is logged into a baggage-tracking database, and the system works to reroute it so it can catch up with you. If the external tags have fallen off, handlers open the bag and search for anything that identifies the owner – a name, phone number or address. Most of the time they find something to send the bag on its way home.

Around 8% of bags are “John Does,” with no identifying information at all. After about three months in airport storage, those bags are officially considered orphaned and that’s when their second life begins.

What happens to luggage that’s never claimed?

Unclaimed bags are no longer incinerated or dumped as they once were — today they are sorted by specialist companies and resold, repurposed, donated or recycled. Behind the scenes, these companies receive truckloads of luggage at their processing facilities. Staff sort every item and decide what happens to it:

  • Clothing is often sent to commercial laundries and cleaned before sale.
  • Electronics are tested and fully wiped of personal data.
  • Trained specialists assess and price everything for the sales floor.
  • Anything that doesn’t sell is frequently donated through charity partnerships — locally, nationally, or globally — or responsibly recycled.

Very little goes to waste.

Who buys unclaimed luggage?

Unclaimed baggage has become a consumer phenomenon, with two main models: resale of sorted contents, and auctions of unopened “mystery” bags. The best-known players are:

  • Unclaimed Baggage, based in Scottsboro, Alabama, buys lost luggage from airlines and resells the contents — sometimes, remarkably, back to the original owners. It has grown into a genuine retail destination.
  • Greasby’s in the UK and Mulberry Bank in Scotland run a different model, auctioning unopened mystery bags to collectors and thrill-seekers gambling on what’s inside.

The appeal is easy to understand: nearly-new luggage and goods at a fraction of retail price, or the thrill of gambling on a mystery box that could hold treasure or trash.

What are the strangest things found in unclaimed luggage?

Over the decades, Unclaimed Baggage has reported some genuinely jaw-dropping discoveries. A few of the most famous finds reported over the years include:

  • A 40.95-carat natural emerald, reportedly one of the most valuable single items ever pulled from a lost bag, later dubbed the “Unclaimed Emerald.”
  • A guidance system for an F-16 fighter jet, military hardware that had to be returned to the U.S. Navy.
  • A full suit of medieval armour, the kind of thing you’d expect in a museum, not a suitcase.
  • Ancient Egyptian artifacts, including items reported to be thousands of years old.
  • A camera that had been aboard a NASA space shuttle, later returned to the space agency.

The everyday finds carry their own value too: phone chargers, headphones, sunglasses, jewellery, and designer clothing are the bread and butter of the resellers.

What compensation are you owed if your bag is truly lost?

If a checked bag is lost, you are entitled to compensation equal to its value — either when the airline admits it’s gone, or when it hasn’t been returned within 21 days of your flight. Compensation is always capped, and the limit varies by where you’re flying.

Travel Sentry | What Happens to Unclaimed Luggage?

It’s worth checking the specific limit for your route, and your travel insurance — which can sometimes be more generous than the airline’s minimum.

How do you keep your bag off the “unclaimed” pile?

The single most effective step is labelling your bag inside and out, because external tags fall off and an ID card inside is what handlers rely on when they open it. Perfect baggage handling doesn’t exist yet, but you can dramatically improve your odds:

  • Label your bag inside and out. External tags fall off; an ID card inside the bag is what handlers rely on when they open it. This single step makes all the difference.
  • Remove old tags before each trip and make sure your new paper tags are securely applied.
  • Photograph your packed bag and your baggage tag. If the worst happens, you’ll have key documentation to make a claim.
  • Pack smart. Keep irreplaceable items, medication, and valuables in your carry-on, not your checked bag.

Frequently asked questions

How long before luggage is officially “lost”?

A bag is “delayed” if it reaches you within 21 days of arrival. After 21 days or once the airline admits it can’t find the bag, it is officially “lost,” and you can claim the value of its contents.

What percentage of lost bags are recovered?

Roughly 92% of mishandled bags are reunited with their owners, usually within a day or two.

How long do airports hold unclaimed baggage?

About three months. After that, a bag with no identifying information is considered orphaned and moves into the resale or auction system.

Can you buy unclaimed luggage?

Yes. Unclaimed Baggage in Scottsboro, Alabama resells sorted contents, while Greasby’s in the UK and Mulberry Bank in Scotland auction unopened mystery bags.

What happens to items in unclaimed bags?

They are sorted, then resold, donated, or recycled. Clothing is laundered, electronics are tested and wiped of personal data, and unsold items are often donated to charity partners.

How much compensation can you get for a lost bag?

The value of the contents, up to a cap. Within the EU/EEA the limit is roughly €1,900; on many other routes it may be lower depending on the governing rules.

How can I stop my bag from getting lost?

Label it inside and out, remove old tags before each trip, photograph the packed bag and its tag, and keep valuables in your carry-on.

Your lost bag won’t be incinerated or simply vanish the way it might have a generation ago. There’s now a trail, a process, and even a second life for the small fraction of bags that never make it home. But the goal is still to never join that pile in the first place: ninety-two percent of bags come home, and with a little preparation you can make sure yours is one of them.

How to Overcome the Fear of Flying

If you’re an anxious person or have had some bad experiences on planes, it’s entirely natural to worry about flying. Travel Sentry is here to share some practical advice aimed at making the experience easier for you, so you can focus on your destination – and maybe even get to a stage where you can actually enjoy the journey.  

Use the table of contents on the left to jump straight to the advice that’s most relevant to you. Start wherever feels most helpful: there’s no right or wrong place to begin. 

Travel Sentry | How to Overcome the Fear of Flying

Whether you’re preparing for an upcoming trip or reading this from your gate at the airport, it’s okay if you don’t need every tip in this guide right now. 

Some travelers feel reassured by understanding how flying works, while others are looking for techniques to help calm their nerves before take-off.

Rational Approaches: for those who feel better with facts and information 

Air travel is one of the safest ways to travel, with accident rates experiencing a massive decline over the last several decades. Commercial airlines securely operate roughly 40 million flights every year. Across those millions of flights, fatal accidents remain incredibly rare; typically numbering between 3 and 8 in any given year.

Despite this, people often fear flying more than driving because of the blend of loss of control, unnaturalness of being in a tube suspended at 35,000 feet and lack of familiarity with the mechanics of flight. Statistically speaking, driving is much more dangerous, but because we do it almost every day, it feels like a routine, mundane activity and that familiarity breeds a false sense of security.

Every time you fly, you’re in the hands of highly trained pilots and professional cabin crew who are extensively prepared to handle a wide range of situations with far more training than the average person receives before getting behind the wheel of a car.

Security threats involving commercial aviation are extremely rare, thanks in part to multiple layers of security, including advanced passenger and baggage screening, intelligence sharing and strict airport security procedures. TSA locks play a small but important supporting role by allowing security authorities to inspect checked baggage when necessary, without damaging luggage, helping screening processes operate more efficiently at scale.

Emotional Approaches: for managing worry, stress and anxious thoughts 

Identify Your Personal Triggers: Before you can address your fear, it helps to understand what’s driving it. Many anxious flyers aren’t afraid of flying itself, they’re reacting to a specific trigger, such as turbulence, a feeling of lost control or concern about having a panic attack. Identifying your trigger is often the first step towards managing it.

  • Try Breathing Techniques: Use the 4-7-8 Breathing Method: Inhale through your nose for 4 seconds. Hold for 7 seconds. Exhale slowly through your mouth for 8 seconds. This physically forces your nervous system to calm down.
  • Grounding Techniques: You can also shift focus away from anxious thoughts by identifying five things you can see, four you can touch, three you can hear, two you can smell, and one you can taste.
  • Progressive Muscle Relaxation: Systematically tense and then completely release different muscle groups, starting from your toes and moving up to your head. This releases physical tension often hidden by stress.  

Ultimately, be kind to yourself – remember that anxiety doesn’t mean danger and if your anxiety is particularly severe, consider getting professional support whether that’s from your doctor with a course of Cognitive Behavioral Therapy (CBT) or by going on a course like this one run by Easy Jet or this from Virgin Atlantic or this offering from British Airways.

Practical Tips: simple things you can do before and during your flight 

Before the Flight

  • Demystify Turbulence: Once you learn a bit about how planes work, you’ll understand that turbulence is entirely normal and safe. It is just like driving over bumps on a rough road.
  • What’s That Sound? This is a great resource which talks you through the different sounds and sensations you’ll experience during your flight.
  • Choose Your Seat: Book a seat over the wings. This area is the plane’s centre of gravity and experiences the least movement. You are also close to the emergency exit, if this is something that you find reassuring – plus you usually have some extra leg room.
  • Meet the Crew: Say hi to the pilots or flight attendants when boarding. Seeing their calm professionalism can reassure you and you can also tell them that you’re nervous or anxious, if you feel like sharing.
  • Avoid Caffeine and Sugar: Skip the airport coffee and sugary snacks. They spike your heart rate and mimic the physical sensations of panic.

During the Flight

  • Engage Your Senses: Distract your brain with high-absorption activities. Noise-cancelling headphones, video games, a great movie, book or calming podcast can all help take your mind elsewhere.
  • Stay Hydrated: Drink plenty of water. Dehydration worsens physical stress and anxiety symptoms.
  • Homeopathy: Some people find that homeopathic remedies like Rescue Remedy can help. Ask your pharmacist or doctor for their recommendation.

Building Long-Term Confidence: ways to become more comfortable with flying over time 

Overcoming a fear of flying is often a gradual process, rather than a single Eureka moment. The more positive flying experiences you accumulate, the more evidence your brain has that flying is safe and manageable.

Write down three things that went well:  Take a moment to reflect on what went right. Did the aircraft take off safely? Did the turbulence pass exactly as the crew said it would? Did you manage your anxiety better than expected? Even if you felt nervous throughout the journey, the fact that you completed the flight is evidence that you can cope with flying. By consciously focusing on the many things that went smoothly, rather than searching for things that felt uncomfortable, you help your brain build a more balanced and positive association with air travel.

Focus on the destination, not just the journey: Remind yourself of the experiences, people or opportunities waiting for you when you arrive.

Acknowledge every success: Don’t write off a flight because you felt nervous at some point. If you boarded, flew and landed safely, that’s a win.

Confidence doesn’t come from never feeling anxious. It comes from repeatedly proving to yourself that you can fly safely and cope with those feelings when they arise. With time, knowledge and experience, many nervous flyers find that what once felt overwhelming becomes much more manageable.

×
Need answers? We're here to help.